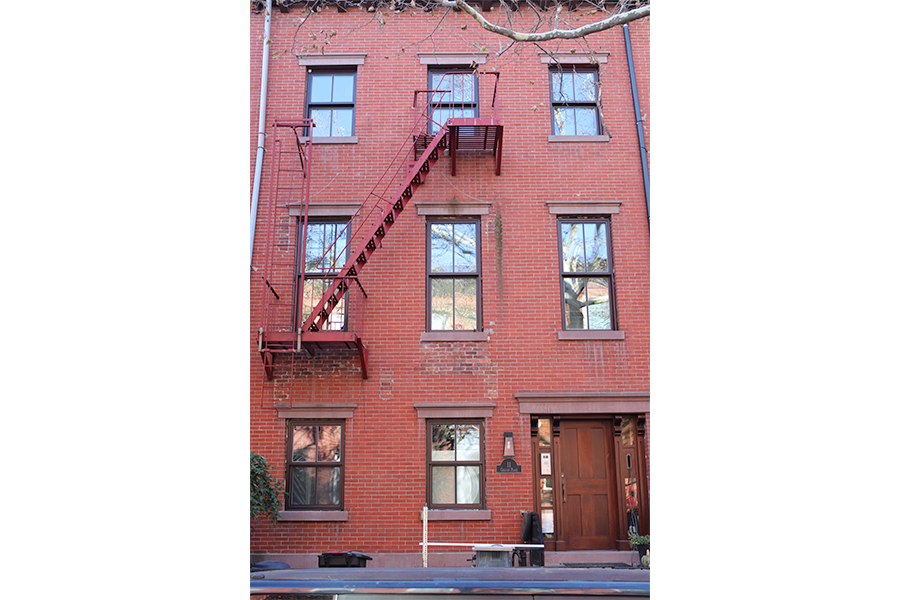
The historic masonry row house (or "brownstone" as we call it here in New York) is a common contributor to the character in many cities and small towns. When renovating them, we must not only look to concerns of historic preservation but be sure to make them as energy efficient as possible and maximize their climate impact for the better. Luckily, we can make our historic buildings very energy efficient while retaining their essential historic fabric.
We’ve developed comprehensive guidelines to historic masonry retrofits as part of our Smart Enclosure series. Here, in this post, we’ll take a focused look at achieving Passive House levels of airtightness when undertaking retrofits, in the following order:
- Rundown through the critical areas that airtightness must address
- Discuss locating inboard vs. outboard airtightness
- Inventory the details, materials and methods to address each area and location
- A reminder about blower-door testing
- Concluding with emphasis on continuity
CRITICAL AREAS
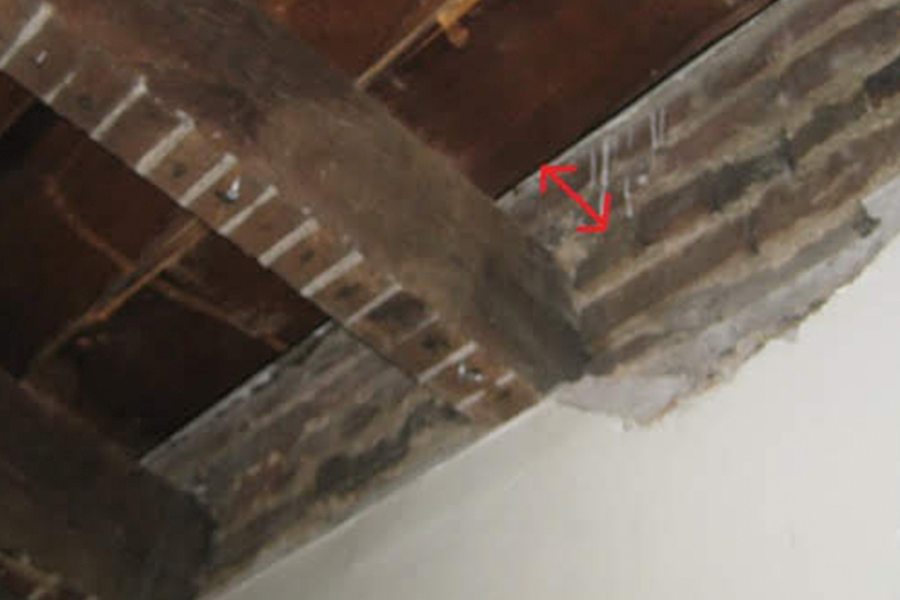
Exterior Walls and Party Walls: When looking at airtightness, the first obvious problem is the exterior solid brick walls which leak. Imagine that the mortar joints are a labyrinth of air-transfer straws, connecting one side of the wall to the other, allowing great amounts of air leakage during the blower-door test and heat loss in operation. But this problem also holds true for party walls. With a blower-door test, the masonry party wall is exposed as little more than swiss cheese. And while the heat loss may not be as great a concern to an occupied neighbour, to ensure predictability, healthy indoor air quality, and long-term durability, addressing the party wall is absolutely necessary.
Floors and Roofs: The problem in this case, is of course that dirt leaks air. If you blower door a dirt floor you’ll see air bypass the wall foundation construction. So we can’t ignore the airtightness of the ground connections. Roofs are perhaps the most critical element to make airtight - to prevent heat loss but particularly to avoid moisture damages at the roof assembly. We need these renovations to last another 100 years!
Penetrations and Connections: With the six sides of a row house building addressed properly, the greatest threat to high performance, both in the near and long term, are the connections between the six sides and the many penetrations through them. Addressing these areas robustly is fundamental to delivering predictable performance.
LOCATING AIRTIGHTNESS: INBOARD VS. OUTBOARD
Before we jump into the details and materials and methods - we should note that for exterior assemblies the primary air barrier should be inboard of the insulation. This location keeps the humid, conditioned air in the conditioned space and away from potentially cold surfaces that can cause condensation and moisture damages. A secondary air barrier or “windtight” layer is located outboard of the insulation and it is critical to prevent wind-washing of the insulation and ensuring the insulation’s thermal performance is optimized.
At party walls, where there is often no insulation, there is typically only one air barrier located at the face of the party wall masonry.
DETAILS, MATERIALS & METHODS
Let’s take a look at some of the critical areas and the detail, material, and methods commonly used as a best practice to achieve Passive House level high performance.
Uninsulated Party Walls: After years of making do with various membranes, sheathings, and tapes, we finally have a simple and robust methodology for air sealing uninsulated party walls:
- Remove all wall finishes and pull subfloor back from wall 6” minimum to fully expose masonry structure. (Note: plaster adhered directly to masonry and in sound condition, may remain and be incorporated as part of air barrier.)
- Repair masonry and spot point, eliminating significant divots.
- Brush and clean to minimize dustiness and other contaminants at masonry, plaster or wood elements, including wood floor joists.
- Apply vapour permeable VISCONN liquid air barrier in two coats at masonry and connecting to plaster remnants and wood joists. Apply with an airless sprayer and paint brush.
VISCONN, is a liquid-applied air barrier for robust connections. VISCONN can be brushed, rolled or sprayed on as a liquid film and forms a seamless, elastic, air and vapour variable membrane once dry. It can span gaps or cracks ⅛” wide and can be applied to masonry, plaster, and wood, making historic building conditions a perfect application.
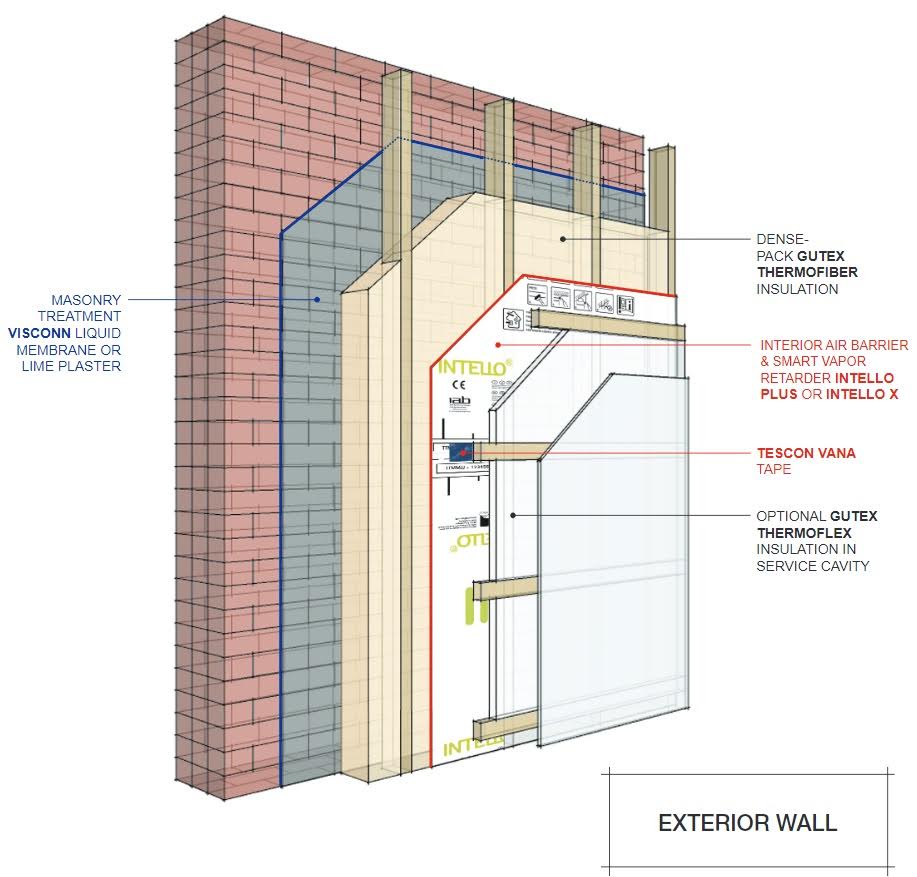
Insulated Exterior Walls: We use the four steps above shown at the party wall to start but then need to deal with insulation, window, door, and other penetrations and a primary air barrier inboard of the insulation.
- 1 - 4 see above
- Install interior rough framing offset from masonry face by minimum 1.5” to allow for a continuous layer of insulation.
- Apply EXTOSEAL ENCORS self-sealing sill tape at the window and door rough opening sills.
- Install windows and doors - with pre-installed CONTEGA SOLIDO SL tape at interior and some combination of FIDEN EXO and CONTEGA SOLIDO IQ tape at exterior. (see more here)
- Because the insulation in the framing cavity will be a fibrous dense-pack wood THERMOFIBER or cellulose the primary air barrier, INTELLO PLUS is installed at the interior face of the framing and does triple duty as also dense-pack netting and a smart vapour retarder. Tape all seams with TESCON VANA tape (see install instructions) and make connections to wood and masonry with CONTEGA HF or MULTIBOND and window frames with CONTEGA SOLIDO SL, PROFIL or PROFECT tapes.
- To protect the air barrier, install a service cavity with horizontal wood furring strips 20” O.C. max and wall finish on the strips - allowing electrical and plumbing services to be run inboard of the air barrier and eliminating a multitude of air barrier penetrations, maximizing long-term durability and performance.
Basement & Cellar Floors: Renovating basements and cellars of row houses provides opportunities for significant improvement to the ground condition. Often damp and suboptimal for regular usage, renovating can result in dry and comfortable space. Like exterior walls, we need to deal with water, insulation and airtightness. Ground water should be carefully considered and any issues of rising damp and high humidity dealt with.
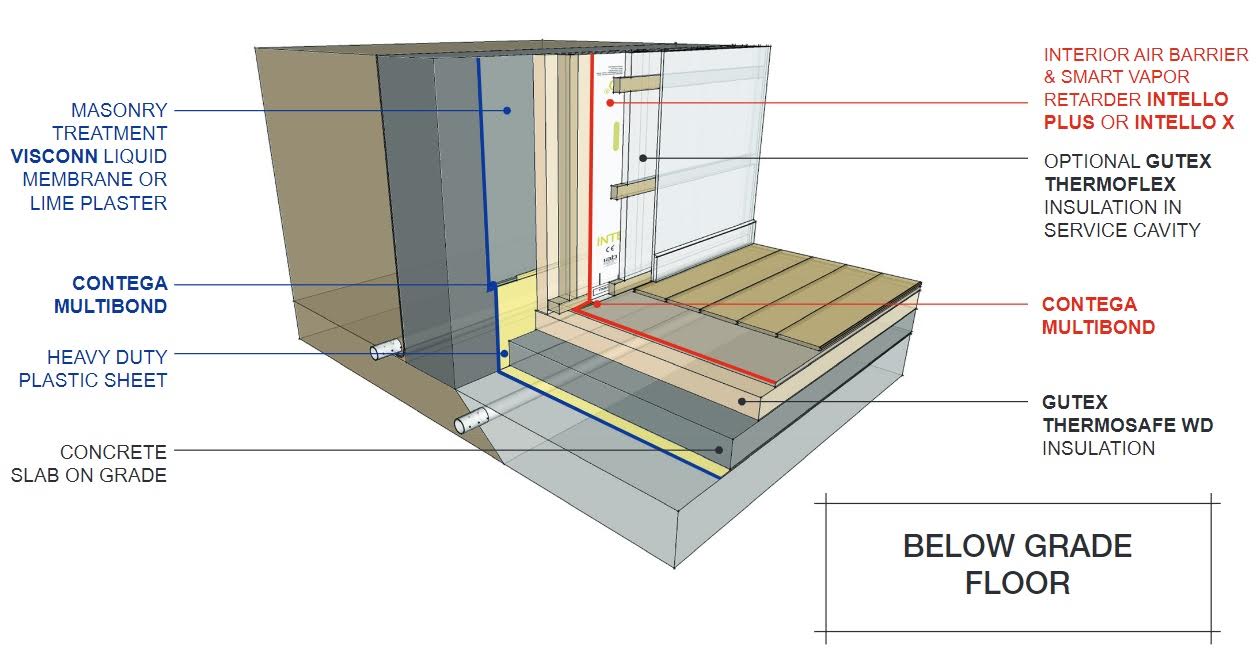
Basements are typically the garden level of a masonry row house, submerged below grade by a few steps at the street front. If the intention is to leave the cellar below unconditioned then the floor of the basement will be the boundary condition, with the floor structure insulated for thermal control. In this way we typically see the following build-up for airtightness:
- SOLITEX MENTO PLUS is installed at the underside of the basement floor joists. (If there is persistently high humidity in the cellar, the vapour retarding DA membrane should be considered.)
- The Membrane extends to the masonry walls surrounding and extends down enough to form a robust connection to the wall treatment with CONTEGA HF or MULTIBOND adhesives.
- Inboard of the insulation if the old subflooring is being replaced by new ¾” sheating subflooring, simply tape the sheathing seams with TESCON VANA. However, if the existing floor boards are to remain with some simple repairs, then apply ADHERO self-adhering membrane across the entire floor to the surrounding walls. The finish floor will then be installed over the ADHERO.
- At the edges of the sheathing or ADHERO, this inboard air barrier must be continuously connected to the exterior inboard air barriers - that is the VISCONN at the party walls and INTELLO PLUS at the exterior walls. Connect to the VISCONN with TESCON PROFIL, PROFECT or CONTEGA SOLIDO SL. Connect to the INTELLO PLUS with CONTEGA HF or MULTIBOND.
At Cellars ground drainage must be carefully addressed first. Insulation will typically either be GLAVEL foam glass gravel that can insulate and provide drainage or mineral wool boards or GUTEX wood fiber boards at floor but above the floor slab. But let’s look at typical airtightness at the ground:
- Typically, above the insulation and below the concrete floor slab, a heavy duty plastic sheet, like STEGO, is utilized that serves as the vapour barrier (addressing moisture issues) and also serves as the air barrier. And the seams of the plastic sheets are taped with COMPEGO tape.
- The edges of the plastic sheet should extend up the exterior masonry walls above where the top of slab will be, so that the edge connections can be inspected and repaired as might be necessary.
- The plastic sheets can then be connected to the walls with a continuous bead of CONTEGA HF or MULTIBOND adhesive. If the walls are being treated with plaster then CONTEGA SOLIDO SL tape is a better option to allow for plastering over the tape.
Roofs: Existing row house roofs are typically some variation on the historic cockloft approach, often uninsulated and ventilated. The roof deck framing is pitched slightly and is held above the top floor ceiling framing to form a cavity that varies in height at the front of several feet to the back where there may be no more than one foot. Because historic details can make insulating on top of the roof deck prohibitive, here we typically utilize the found space of the cockloft to form a deep, if tapering, insulation layer, resulting in an unvented flat roof. Because the roof is unvented, precautions must be taken. (See: The Ten Golden Rules for Foam-Free Flat Roofs) The airtightness achieved at the roof will be a critical aspect of ensuring durability.
Row house stairways and shafts require exit hatches (aka "scuttles") for FDNY access to roofs, as well as to provide egress with a stationary ladder under them as per NYC Building code, multiple dwelling law, and per FDNY regulations. Traditionally these were unsecured, latched pieces of plywood or thermally unbroken Bilco hatches - but per 21st century standards, can and should be airtight, fully insulated exit hatches to protect interiors from condensation without energy/heat losses. We recommend the Lamilux FE exit hatch for the job, which are in stock in the USA in several sizes.
Here are the steps:
- First be sure the exterior masonry walls are airsealed up through the zone of roof structure to the exterior decking above using VISCONN and steps for walls outlined above. The VISCONN should connect continuously to the underside of the roof deck. (The roofing membrane above forms the outboard windtight/airtigthtness.)
- Like the exterior walls, with the framing complete, install INTELLO PLUS at the interior face of the framing, taping all seams with TESCON VANA per the installation instructions. The membrane should extend to all surrounding masonry walls, continuously, and have enough slack to drop down the wall for easy and clear connections to walls that are verifiable and repairable.
- Connect the membrane to the VISCONN at the party walls with CONTEGA HF or MULTIBOND and to the INTELLO PLUS at the exterior walls with TESCON VANA.
- Often new LAMILUX skylights are installed as part of the renovation and the membrane is taped to the preformed curb.
- Like the walls, wood battens are installed to form a service cavity and the THERMOFIBER or cellulose is dense-packed through it.
Windows, Doors & Penetrations: Typical double-hung windows are very leaky and cannot provide durable performance. Today we have the BEWISO Simulated Double-Hung window that provided thermal and airtightness that delivers Passive House performance and has been certified by the Passive House Institute.
The windows and doors should provide continuity to the control layers, at both the exterior windtight VISCONN layer, and at the inboard INTELLO PLUS layer. Outboard the connections to masonry are typically made CONTEGA SOLIDO IQ and FIDEN EXO with EXTOSEAL ENCORS. (Note the EXTOSEAL ENCORS is not acting as an airtightness component typically here, but as a waterproofing material.) TESCON PROFIL and PROFECT are also commonly used. If conditions are warranted, as a result of the roughness of surface, CONTEGA HF or MULTIBOND may be used in combination with a tape. At the interior connections CONTEGA SOLIDO SL, TESCON PROFIL or PROFECT are typically used to connect the frame to the INTELLO PLUS.
The use of strapping and service cavities at the INTELLO PLUS at roofs and walls should reduce the number of MEP penetrations through the air barrier. Yet penetrations for services such as water, electricity and ventilation will persist. Where pipes, ducts and wires insist on penetrating the airtight layers, flexible gaskets such as ROFLEX, ROFLEX SOLIDO and KAFLEX gaskets are made for the job at hand. If specialized gaskets are not available when needed - TESCON VANA and CONTEGA and COMPEGO tapes may be used to accomplish the air sealing required.
BLOWER DOOR TESTING
Just as our blood pressure is a critical measure of our health, airtightness is a critical measure of building health. And like blood pressure, we are fortunate to be able to easily and reliably measure building airtightness, in this case with blower-door tests. Furthermore, we are fortunate that such a fundamental metric of building performance is easily verifiable. Do not contemplate doing all this air sealing work without completing blower-door test(s).
Pressurize and depressurize - inspect the airtight layer while under pressure. Find leaks and then fix them. A building can never be too tight, even an old historic masonry rowhouse.

IN CONCLUSION: CONTINUITY
In the end, the success of the air sealing work will depend on how continuous it was done. Were the gaps and holes located in testing and fixed? Were the walls continuously connected to the roof and floors? Were windows and doors continuously connected? No interruptions! Continuity is quality.


 Get Access to all Masonry: Particularly at intersections of floors and walls where leaks and damages are more likely. Here the crown moulding, base moulding and flooring is pulled away from the wall to expose the interstitial masonry surfaces - allowing for full access.
 Existing Plaster May be a Useful Air Barrier: Where the plaster was sound it is left in place and acts as a component in the new continuous air barrier.
 Stitching to Completeness: Here,
  Wall Floor Connections are Notoriously Discontinuous: The subfloor is kept away from the masonry and
 Air Barrier Inboard of Insulation: The
  The Service Cavity Protects Control Layer: Service cavity strapping not only supports the dense-packing but provides space for electrical wiring and plumbing roughing to be run while minimizing penetrations to the control layer.
 Any Geometry is Possible: Protection and flexibility.
 Termination at Party Wall:
  Picture Perfect: A neat job is often an airtight job.


 Roof to Wall Connection: Here
  Pitched Roof:
 Windows & Doors - Interior Sills: High-performance air tight and thermally broken broken window and doors are connected to interior membrane with
  Windows & Doors - Interior Jambs: Similar to the interior sills,
  Match Historic Profiles: With BEWISO windows, as this project shows, simulated double-hung are visually indistinguishable from their poor performing counterparts.
 Skylights - Interior: The
  Ventilation Duct: Flexible EPDM gasket
  Large Pipes:
  Small Pipes: Small