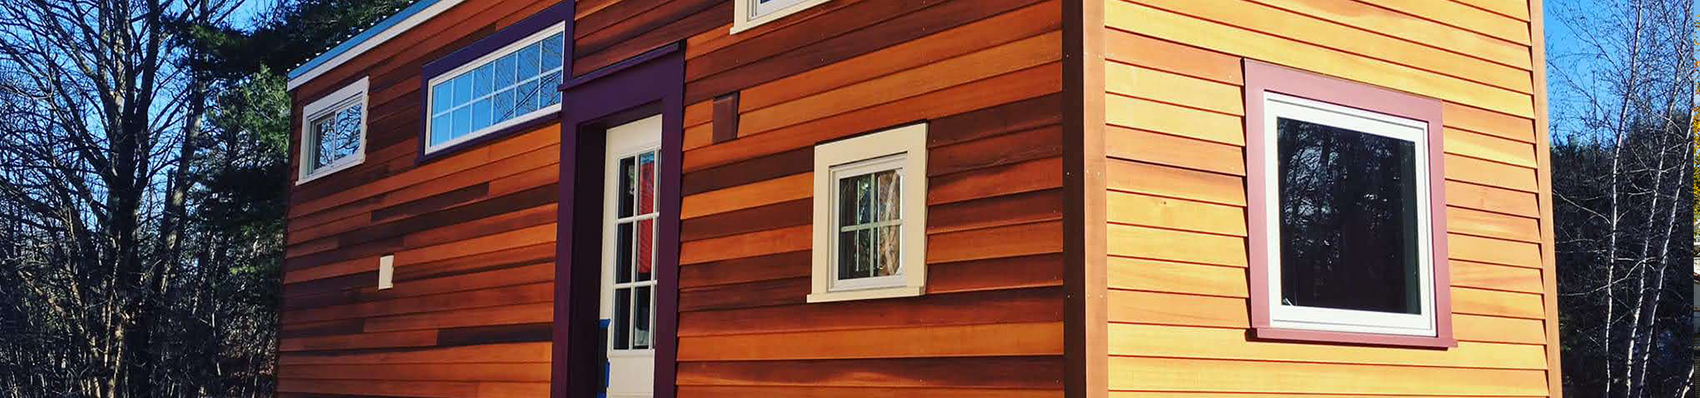

This post is written by a customer, sharing their experience building a foam-free tiny house with the help of 475 High Performance Building Supply product consulting and materials.
First-hand accounts of a high performance tiny house on wheels
"Hi everyone,
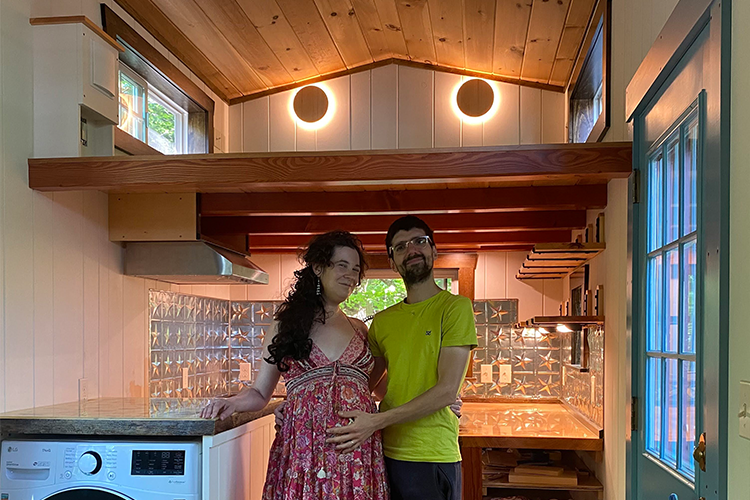
My name is Carmine, I’m from Italy and since 2018 I’ve lived in New Hampshire with my wife Kyle. Over the last three years we designed and built a movable tiny house together. I’d like to tell you a little about the story of our project."
When I moved to New Hampshire I had no experience in construction, so I thought it would be a good idea to take one year just to research, work with a general contractor to develop some essential skills, and find an experienced builder to help me, at least, with the framing. After a while the general consensus I received from the people I spoke with was that for a movable tiny house my only sensible option was to use 2x4 walls and closed cell spray foam insulation. Although we were not very comfortable with the idea of using spray foam, it sounded like we had no choice, so we were going to go for it.
With the understanding that we were going to live in an airtight home surrounded by petroleum based insulation, we started looking for a heat recovery system to help with humidity control and air quality. That’s when I came across 475 High Performance Building Supply and their New England product consultant Oliver Klein. I still remember our first phone call. I said, “I don’t really want to use spray foam, but I don’t know how to do it”. He replied, “It’s very simple: if you don’t want to use it, you just don’t use it!”. From there he introduced me to the 2x Framing e-book, spent several hours with me over the phone discussing ideas and options, and he even stopped by to see the tiny house during a trip to New Hampshire.
When I started looking through the e-book, I immediately knew that this was the way I wanted to build. The fact that I had very little experience or knowledge at the time helped a lot –it was easy to absorb all of this new information because I didn’t have many prejudices or preconceptions to resist them.
Still, incorporating high performance building products and techniques into a tiny house was going to prove to be challenging. Our three main limitations were: height (13’ 6”), width (8’ 6”), and weight (21,000 lbs, the GVWR of our trailer). Because of these limits, we had to make a few sacrifices. First, we had to renounce the idea of having solar panels and batteries to accommodate the extra weight of insulation and framing material. Second, in order to have enough head room in the lofts we had to give up one of the following: a service cavity in the ceiling, extra roof insulation, or roof venting. I became so focused on working within those limits that I didn’t realize until much later that while height and weight are critical, it is very easy to get a wide load permit.
In the end, with all of its joys and limitations, here’s the movable tiny house construction recipe that we came up with:
Framing and Insulation
- Advanced framing with 2x4 walls and 2x10 rafters
- For insulation we chose Rockwool over dense-packed cellulose for two reasons: I was having difficulty finding a company that would insulate a tiny house with dense-packed cellulose within a reasonable time frame, and I considered the building process as a school for myself, therefore I wanted to do as much of the work as possible (with the exception of gas and electrical). I knew I could learn how to install Rockwool myself.
Walls - exterior
- Solitex Mento 1000 as WRB with Tescon Vana
- Extoseal Encors for door and window sills
- Roflex and Kaflex gaskets for sealing around pipes, ducts, and wires
- Vented rainscreen with Cor-A-Vent Sturdi-Strip nailed along the studs and SV-3 with integrated insect screen at the top and bottom of each wall and window to provide weep holes and promote air flow behind the siding. The choice to use this product was mainly dictated by weight and width reasons: it’s very light (it’s made of hard corrugated plastic) and it’s 3/8” thick (although it can be doubled to 3/4”)
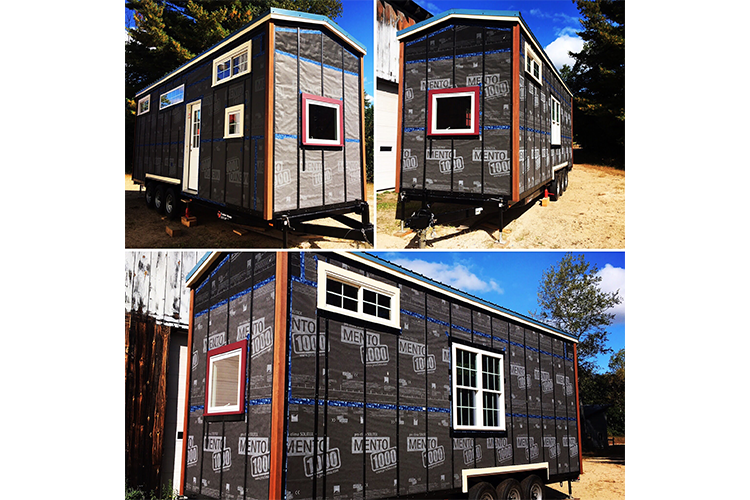
Sturdi-Strip are fastened vertically along the studs, SV-3 horizontally at the top and bottom of each wall and window.
Vented Roof (components listed from top to bottom)
- Metal roof
- 5/8” plywood fastened to the battens, with Ice and Water Shield on top (the latter was probably not strictly necessary, but I was in paranoid mode at the time)
- 2x4 battens on the flat fastened along each rafter (in combination with Tescon Naideck to seal screw penetrations) to create a 1 1/2” air gap
- Solitex Mento 3000, applied directly on the rafters
- 2x10 rafters
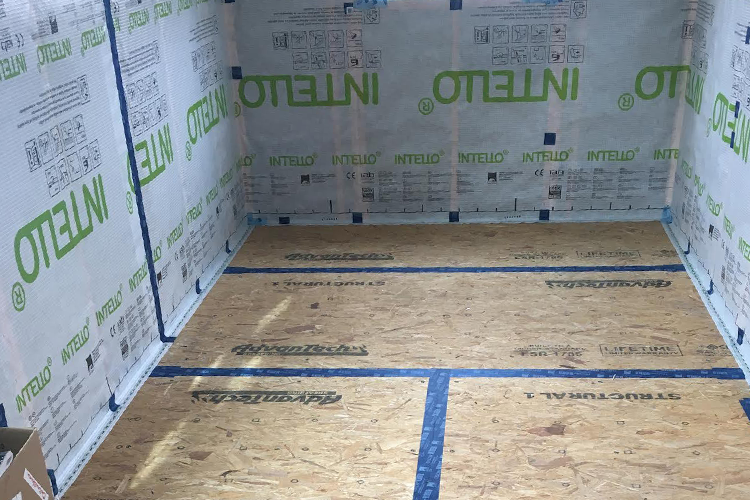
vapour barrier: walls
- Intello Plus with Tescon Vana
- 1 1/2” service cavity with horizontal 2x3 battens on the flat, in which we ran the wires and plumbing; we then insulated the service cavity with an additional 1 1/2” of Rockwool (for a total of 5”: 3 1/2” in the wall cavity + 1 1/2” in the service cavity)
- Contega HF to connect the Intello to the subfloor (plus Vana for taping seams and screw heads in the subfloor)
- Tescon Profil to tape the Intello to the door, windows and square/rectangular penetrations
- Roflex and Kaflex gaskets for sealing around pipes, ducts, and wires