

This blog is part of a series about air barrier transitions to help continuity. Check out Air Barrier Transitions Simplified: Applied Rafter Tails, and Air Barrier Transitions Simplified: Foundation to Wall
You know the air barrier must be continuous, without interruption around the entirety of the conditioned space - inboard of the main insulation layer, thereby keeping the conditioned air within the conditioned space, optimizing efficiency and minimizing the chance of moisture damages. The red pencil diagram below is a typical illustration of this idea.
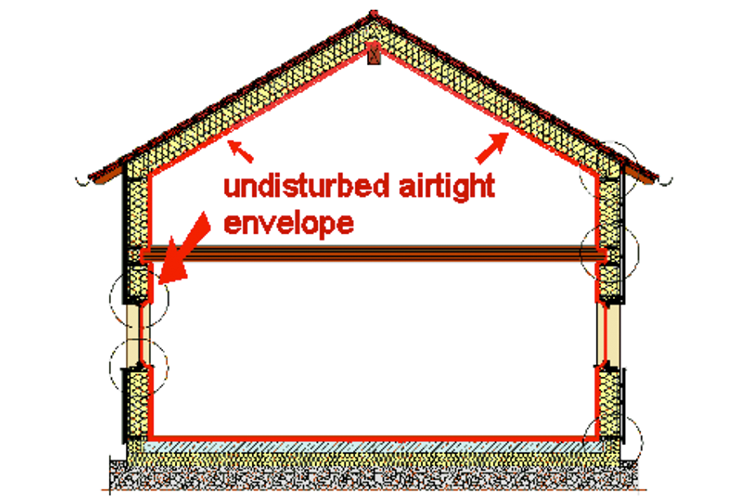
Credit: Passive House Institute
Of course, things get tricky at junctures and in particular at rim joists and the perpendicular floor joists tying into them. Projects can continue the INTELLO membrane directly up and between the floor joists, but then the joists interrupt the connection and need to be airsealed around.
There are several other ways to make continuity at the rim joists. These ways tend to require air barrier sequencing during the framing of the home. Here’s a quick overview of a few options:
1. Apply Pro Clima VISCONN liquid air barrier at interior.
Tying INTELLO PLUS membrane to it above and below with a combination of TESCON VANA tape or MUTLTIBOND or CONTEGA HF adhesive. The VISCONN air barrier can be brushed or sprayed into the joist bays, as shown below.
The INTELLO membrane from the floor below is taped to the top plate and then VISCONN is used to airseal the top plate to the rim joist (VISCONN’ing around any interruptions) and then from the rim joist to the underside of the subfloor sheathing. The subfloor sheathing’s seams can be taped from above and the INTELLO membrane on the wall can be taped to the same subfloor sheathing.
2. Tape the top plate to the rim joist.
The top plates of the wall are taped and then the rim joist is taped from the top plate over and around the rim joist to the subfloor sheathing. The wall sheathing is held and all of this transition taping is done before concealing the rim joist with wall sheathing.


3. Wrap the membrane around the rim joist.
This requires coordination with the framing work. Because the membrane often is outside a majority of the insulation at the rim joist we use a strip of SOLITEX MENTO 1000, which is vapour open. The three steps are illustrated below: First applying membrane to top of lower framing. Installing second floor framing and laying membrane back over the floor above. Then framing the wall above and tying the membrane to it. This approach can get complicated at the building’s corners.
 Diagramatic Details of Sequencing
 Wrapping a strip of SOLITEX around the joist for an airtight layer

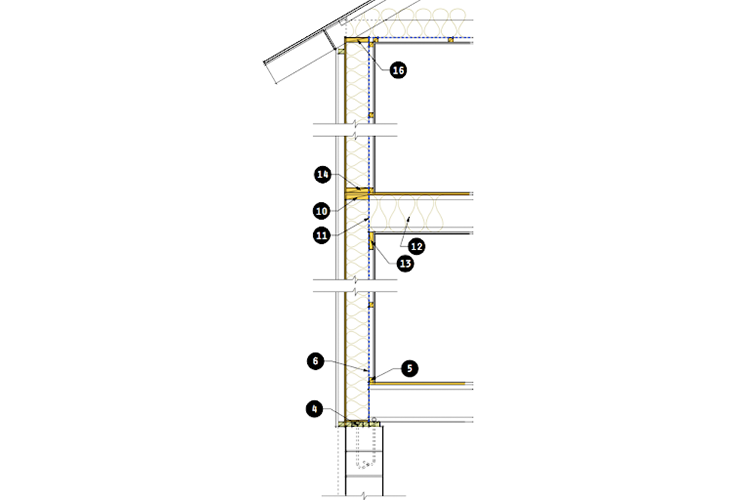
4. Use a ledger board to support the joists and continue the airtight layer straight down.
It’s a method described by Gregory La Vardera on his LamiDesign blog. It avoids any difficult wrapping of membranes around joists. These straight runs reduce complications and chances of errors - resulting in tighter houses and allowing you to get below 0.6ach50 without too many sleepless nights.
Airtight membrane and ledger board solution to keep things simple (more images at lamidesign.com)
Because the heat flow parallel with the grain of the wood (as is the case with a joist) is about 3 times as conductive - 0.38 W/mk, R-0.37/in) compared to 0.13W/mk, R-1.1/in for across the grain - there is an added benefit to keeping the joist ends as far away from your insulation layer as possible. Putting the rim joist behind some insulation (as in the 3d image), combined with Greg's solution, prevents a good amount of thermal bridging.
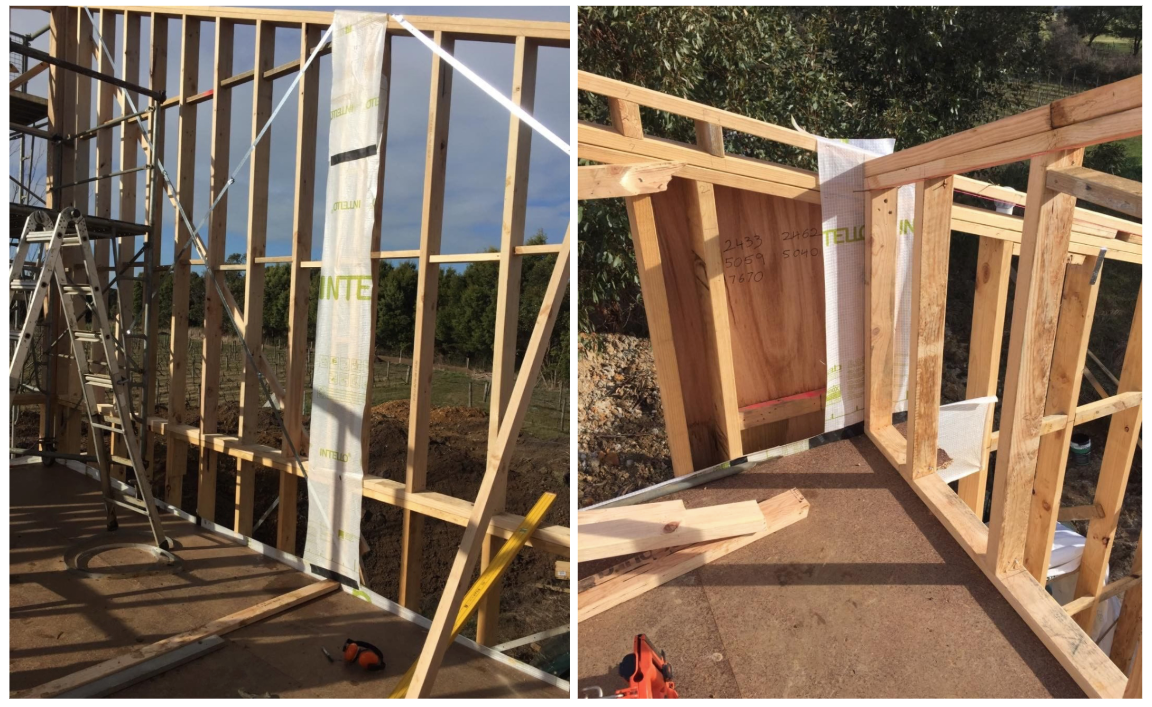
Here is a variation on the La Vardera Platform Framing. At left we see the INTELLO PLUS membrane poking above the second floor with a vertical strip added to the wall for perpendicular wall framing. At right we see the horizontal membrane at the second floor ledger below as well as the second floor framed into another vertical bit.
In practice
A project by New Energy Works in upstate New York provides an excellent example of many of the methods outlined above. Regardless of the connect, they were thoughtful in the way beams and framing members were covered or pre-wrapped before installation.
